Streaming Desk for Twitch and Gaming
This is an overkill streaming desk, and I love it.
I decided I wanted to start streaming my PC gameplay on Twitch. I recently sold my Autonomous standing desk. So I needed a new desk to house my computer gear and thought I’d start over in style.
I wanted to create an epic gaming desk that would give me the flexibility to adjust things as my streaming setup, and skills improved and keep everything off my desk so I could focus on the stream and not the junk sitting on my desk.
The Key Features
Three key features I focused on were:
- To mount accessories to the frame like lighting, mics, and reflectors.
- Keep my monitor at the optimal level (learn how to position your monitor)
- Keep my studio monitors at ear level (learn how to position your studio monitors)
These features directly influenced the height of my truss and my overall frame. I’d recommend figuring out what features are most important to you and then using those as a “box” for your design ideas.
Inspiration for Gaming and Streaming Setups

I started with a basic idea of creating a frame that looked like a stage truss, the metal frames used in live productions and trade show booths. Considering all of the benefits of a truss system, like easy mounting points for gear, strength, rigidity, etc.
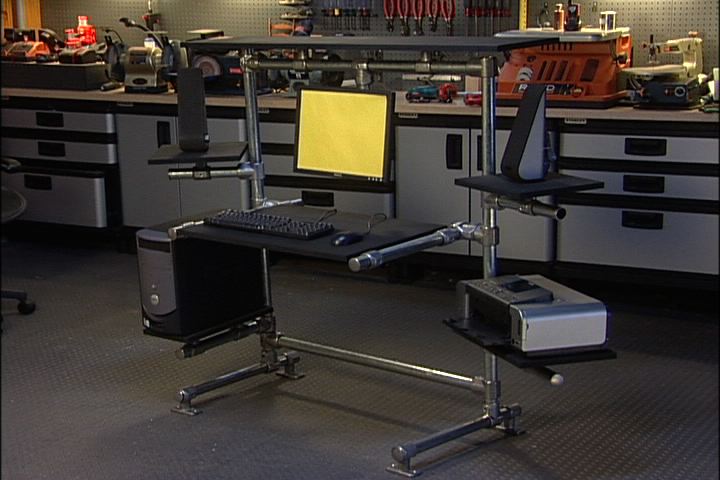
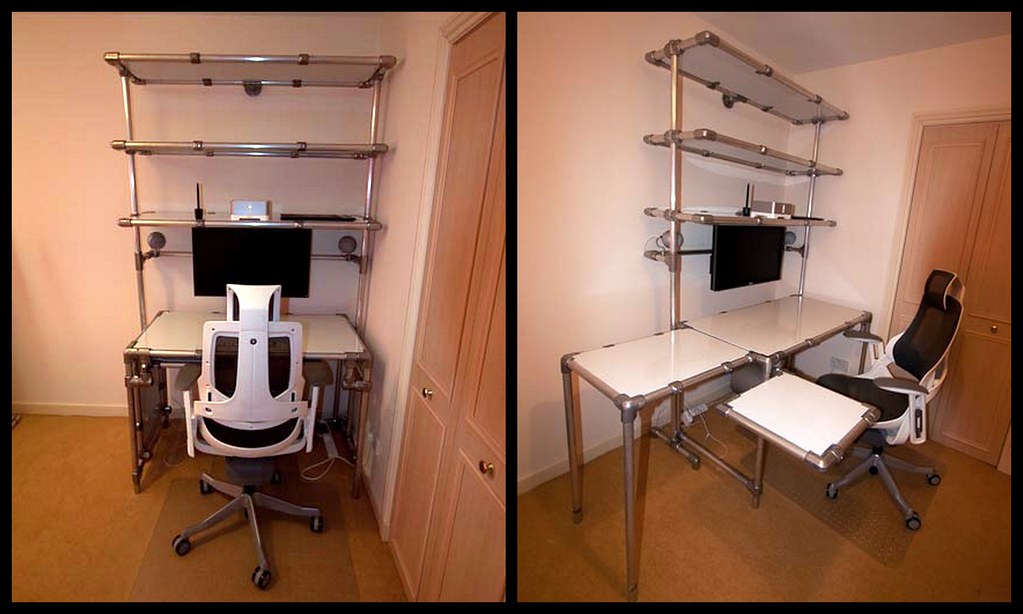
Then I took some inspiration from Simplified Building’s vast library of DIY desk designs. The particular designs that I took some inspiration from are featured below.
Choosing my Materials
I opted to use Kee Klamps from Simplified Building to make my faux-truss.
Kee Klamps, combined with gator tubing or schedule 40 pipes, creates a very flexible system that is easy to build, modify, and transport.
I’m moving in several weeks and am very thankful I chose to use materials that are very easy to disassemble and transport partially.
Moving a desk this large all at once would be a huge PITA. My Corolla only has so much trunk space.
See below for a complete parts list.
For the desktop, I went with basic 2 x 10s from Home Depot and had the friendly staff there cut it down to size for me; this made transportation very easy and saved me a bit of time during the final assembly.
I decided to forego stain, sealing, or anything like that for the desktop. I don’t plan on this desktop lasting me a lifetime and will probably replace it with something much nicer.
The Frame Design
Being a DIYer and a tinkerer, I’m somewhat familiar with the program SketchUp and decided to use that to pull together my initial design ideas. Sketchup is great if you want to build a 3D representation of your idea.
I like to see something in a bit more detail before I drop hundreds of dollars on it.
SketchUp was a perfect way to do that since Walmart and Best Buy don’t carry this over-the-top design on their shelves (which they should, if I do say so myself.)
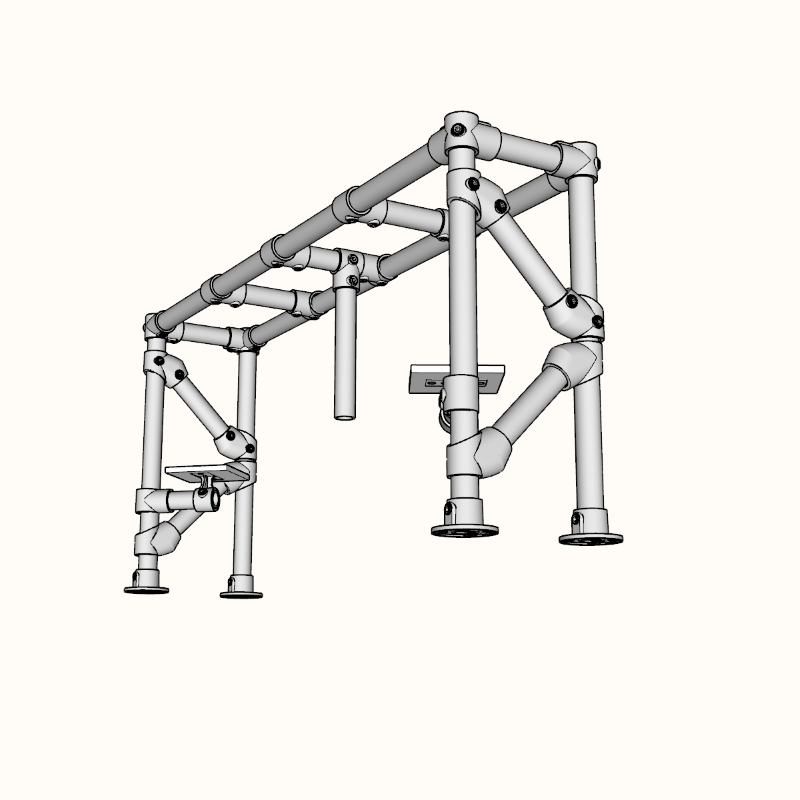
After quite a bit of iteration, self-doubt, and failure, I came up with the following design.
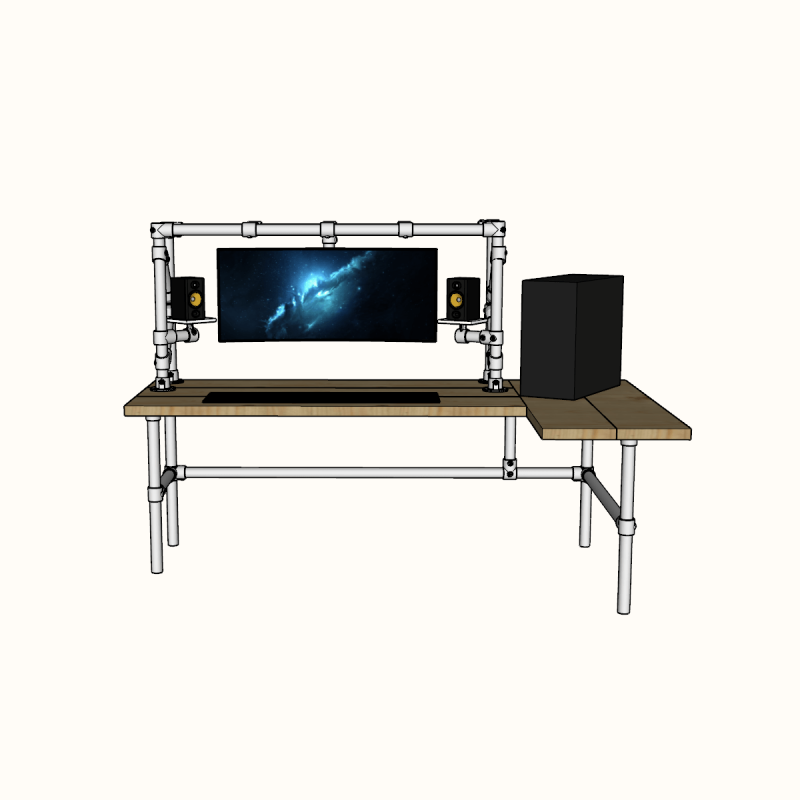
Just like this desk, I went a bit overboard and learned how to use Twilight Render to create a semi-photorealistic image of my desk (and my future DIY loft bed design.)
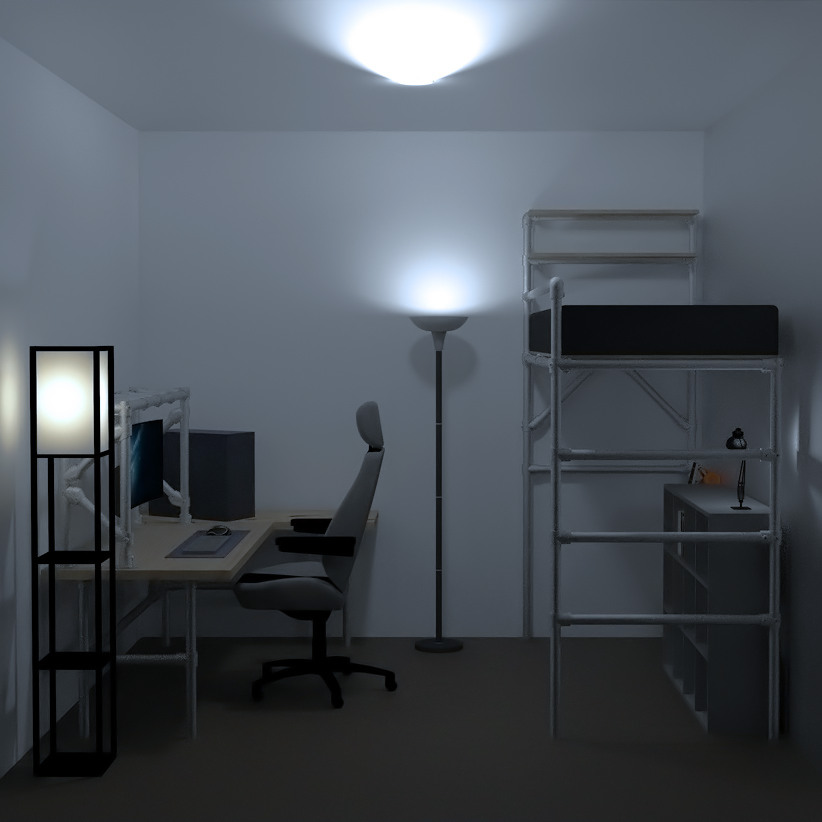
I know, I know. But c’mon, it’s cool!
The hobby version of Twilight Render is also free, so have it, folks!
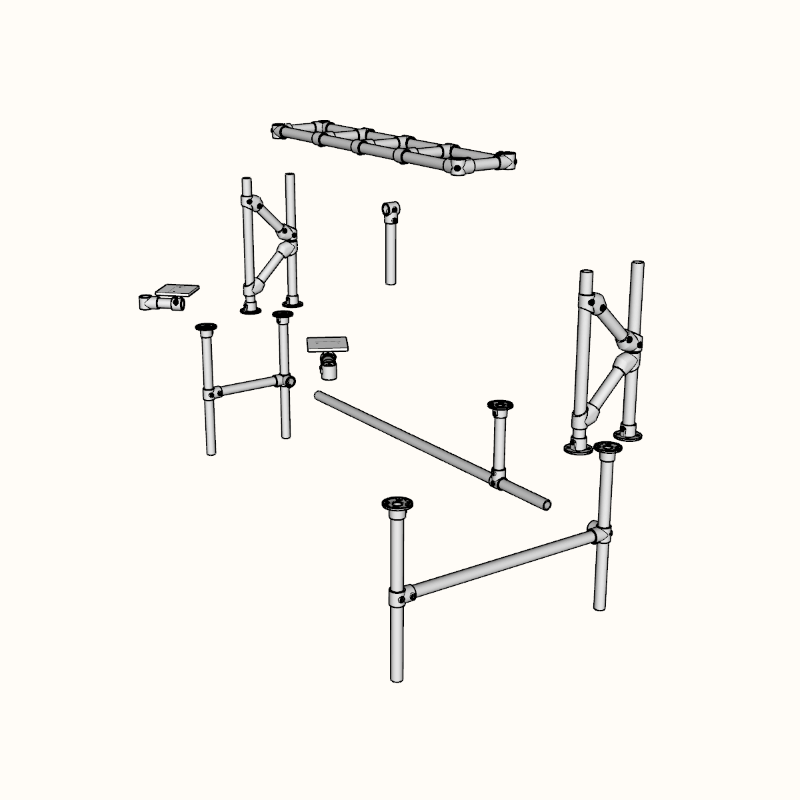
More Angles of the Gaming Desk Design
Here is a bit of an exploded view to see more of the individual components.
Desk Design Thinking & Design Notes
In addition to gaming on my PC, I do a bit of hardware tinkering and PC building, so I chose to add a leaf to my desk to add more usable workspace.
I wanted to get my computer up off the floor, so the leaf also adds more room to fix the computer at an angle and gives me easy access to the top I/O and power switch.
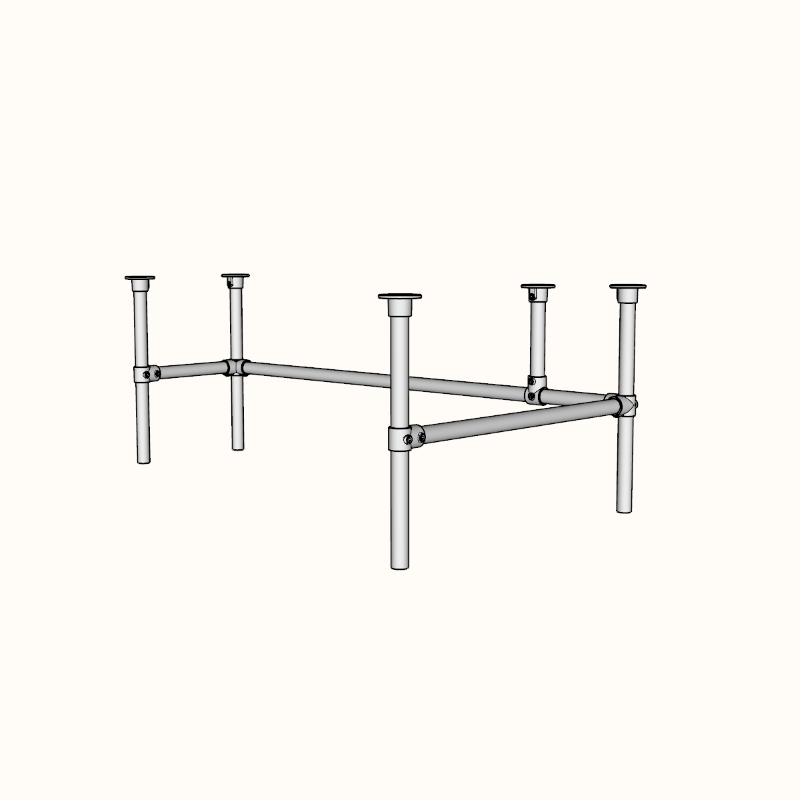
The base of the frame is very basic and functional. I don’t look under my desk often, so I put my effort and money into the top truss frame.
However, I did position my middle support along the back of the lower frame at an optimal footrest level. I like to kick back and watch movies at my desk, which adds some comfort.
I may add some foam padding or something later to increase this comfort. The pipe tends to get a bit cold in the winter months.
As I mentioned before, the height of the truss frame is directly influenced by my need to have my monitor and speakers at optimal levels. So I chose 26″ as my height after doing a bit of testing and measuring.
The Parts List
After “finalizing” my design (nothing is ever final in my world), I created a parts list.
For those curious few, here is a complete parts list for my build:
-
10-6 Kee Klamp x 12
-
61-6 Kee Klamp x 9
-
29-6 Kee Klamp x 8
-
21-6 Kee Klamp x 6
-
70-6 Kee Klamp x 2
Upper Frame Tubing
- 56″ Gator Tube x 2 for upper frame horizontal
- 26″ Gator Tube x 4 for upper frame legs
- 9 1/2″ Gator Tube x 4 for angled supports
- 8″ Gator Tube x 5 for upper frame truss supports
- 6″ Gator Tube x 2 for audio monitor supports
- 20″ Gator Tube x 1 for computer monitor support
Lower Frame Tubing
- 78″ Gator Tube x 1 for long horizontal
- 36″ Gator Tube x 1 for leaf horizontal
- 26″ Gator Tube x 1 for left-hand crossbar
- 24″ Gator Tube x 4 for legs
- 12″ Gator Tube for vertical leaf support
Table Top
- 2×10 cut to 60″ x 3 for Main Desk Area
- 2×10 cut to 40″ x 2for leaf
If you’re looking for an alternative to Kee Klamp, check out Easyfit, they have the same pipe fittings that I used in this build, but they don’t offer custom-cut pipe that you can order through the website.
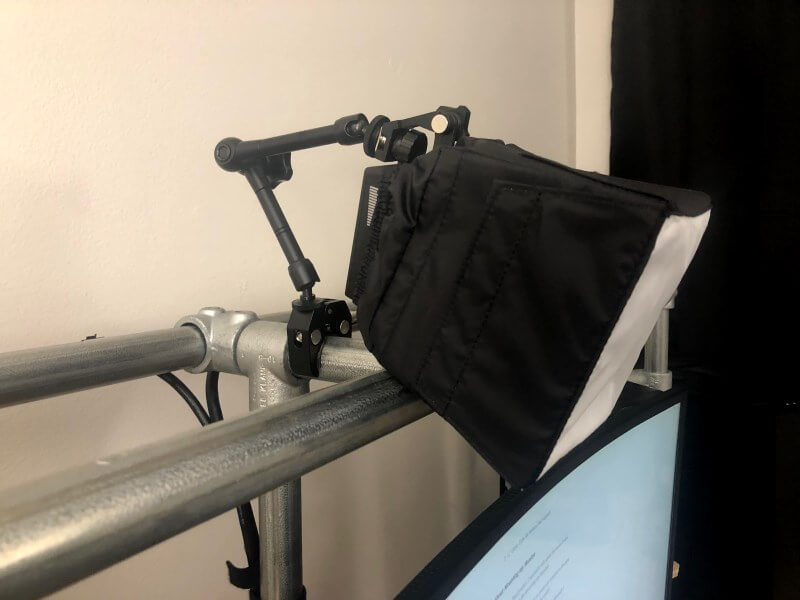
A Note About Mounting My Monitor to My Streaming Desk
Before we jump into the final product, I wanted to talk about the issues I went through trying to find a solution for mounting my monitor.
I spent a good amount of time looking for ways to mount my monitor to the pipe frame; sadly, my initial searches didn’t return anything useful.
So I went with a DIY solution, but that proved to be insecure, and ultimately, I decided I needed a more “professional” solution.

I broadened my search terms after getting discouraged and frustrated with my DIY monitor mount. After another hour or so of Googling various phrases that I thought would return what I was looking for, I finally stumbled upon a VESA pipe mount on Amazon.
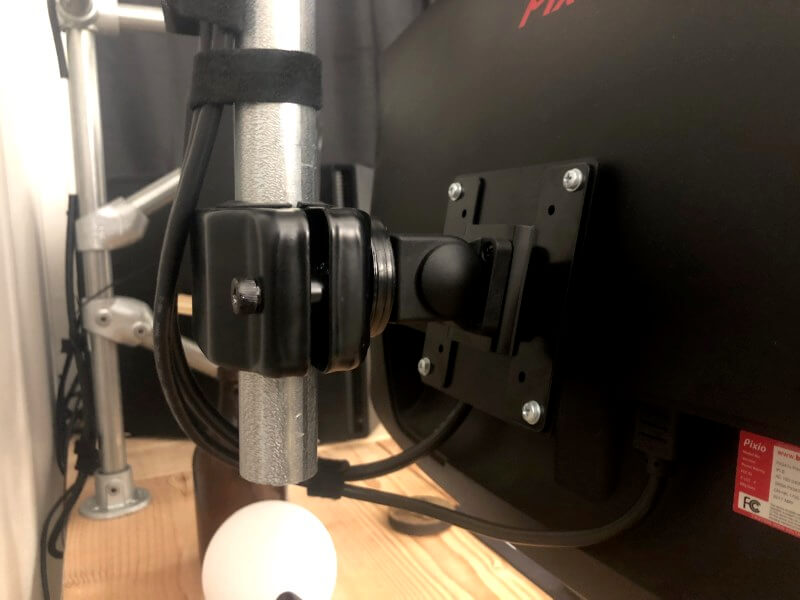
This thing is built like a tank and easily holds my ultrawide monitor, which isn’t as easy as you might think.
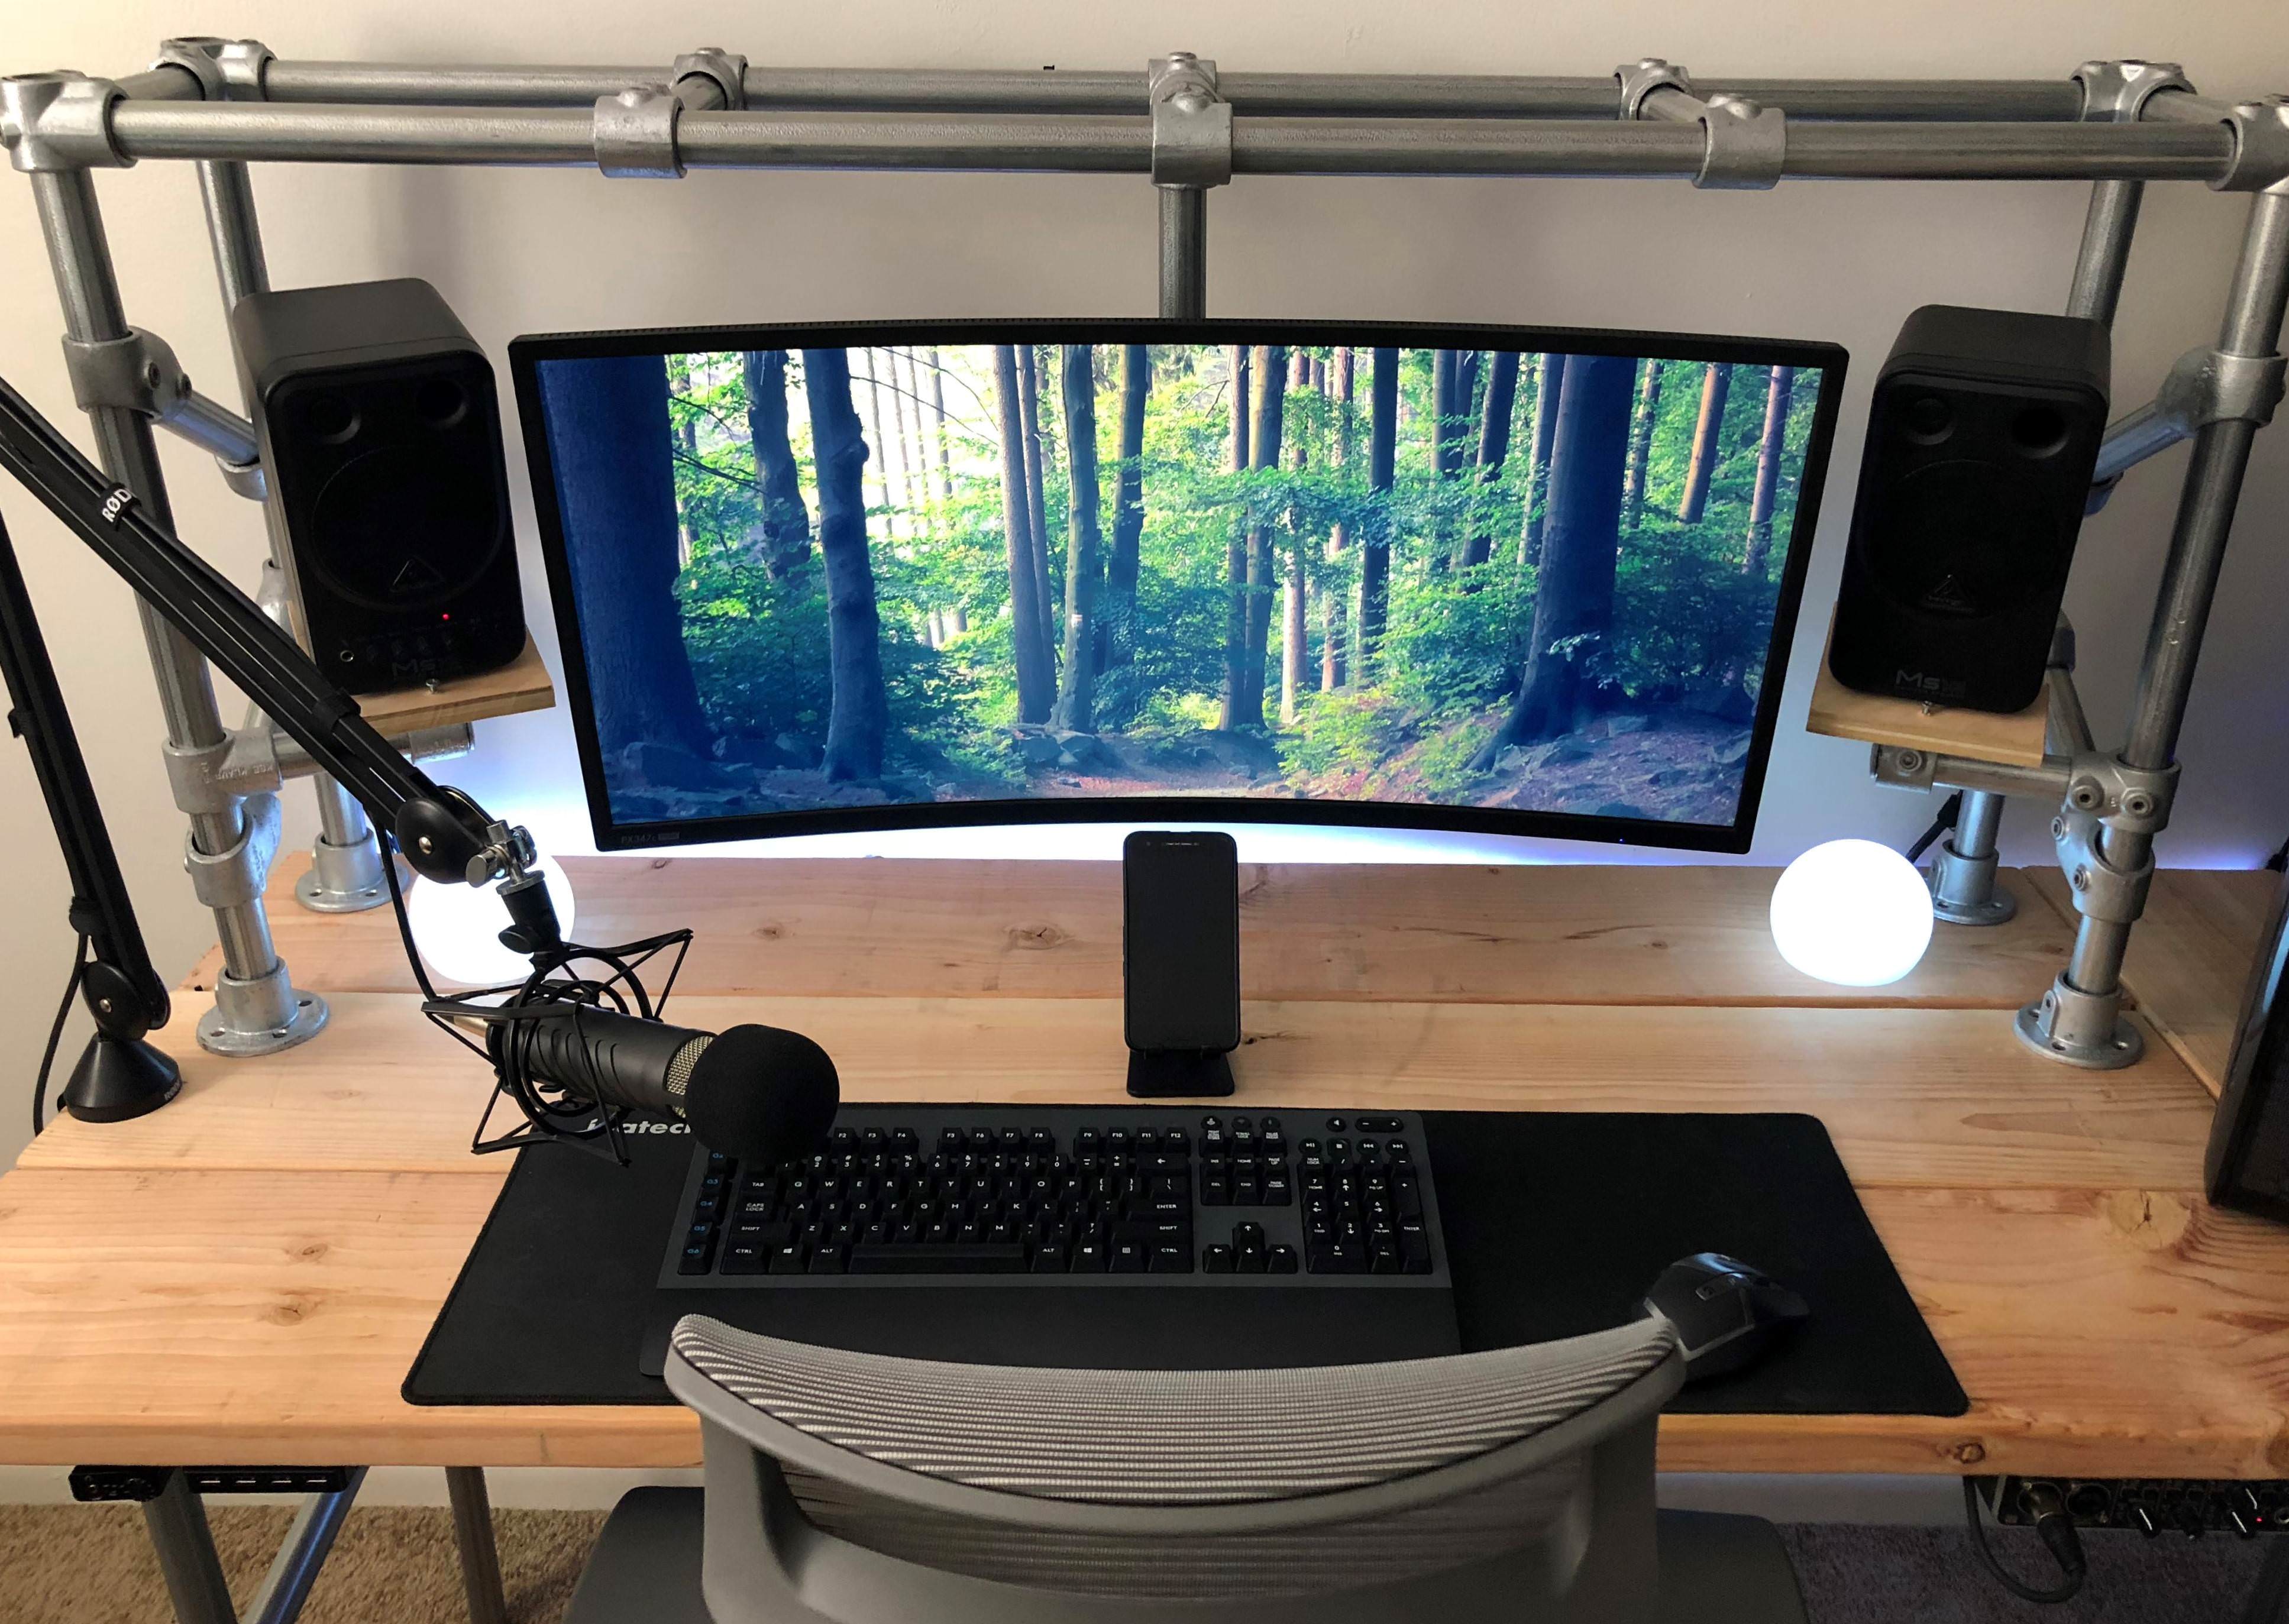
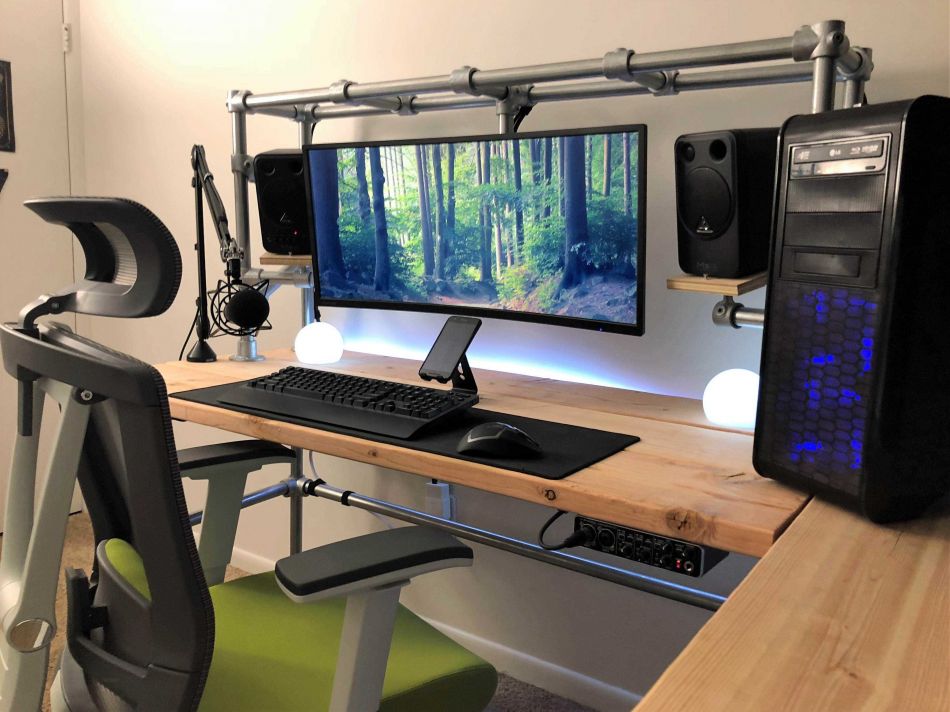
The Final Product: My Epic Streaming Desk
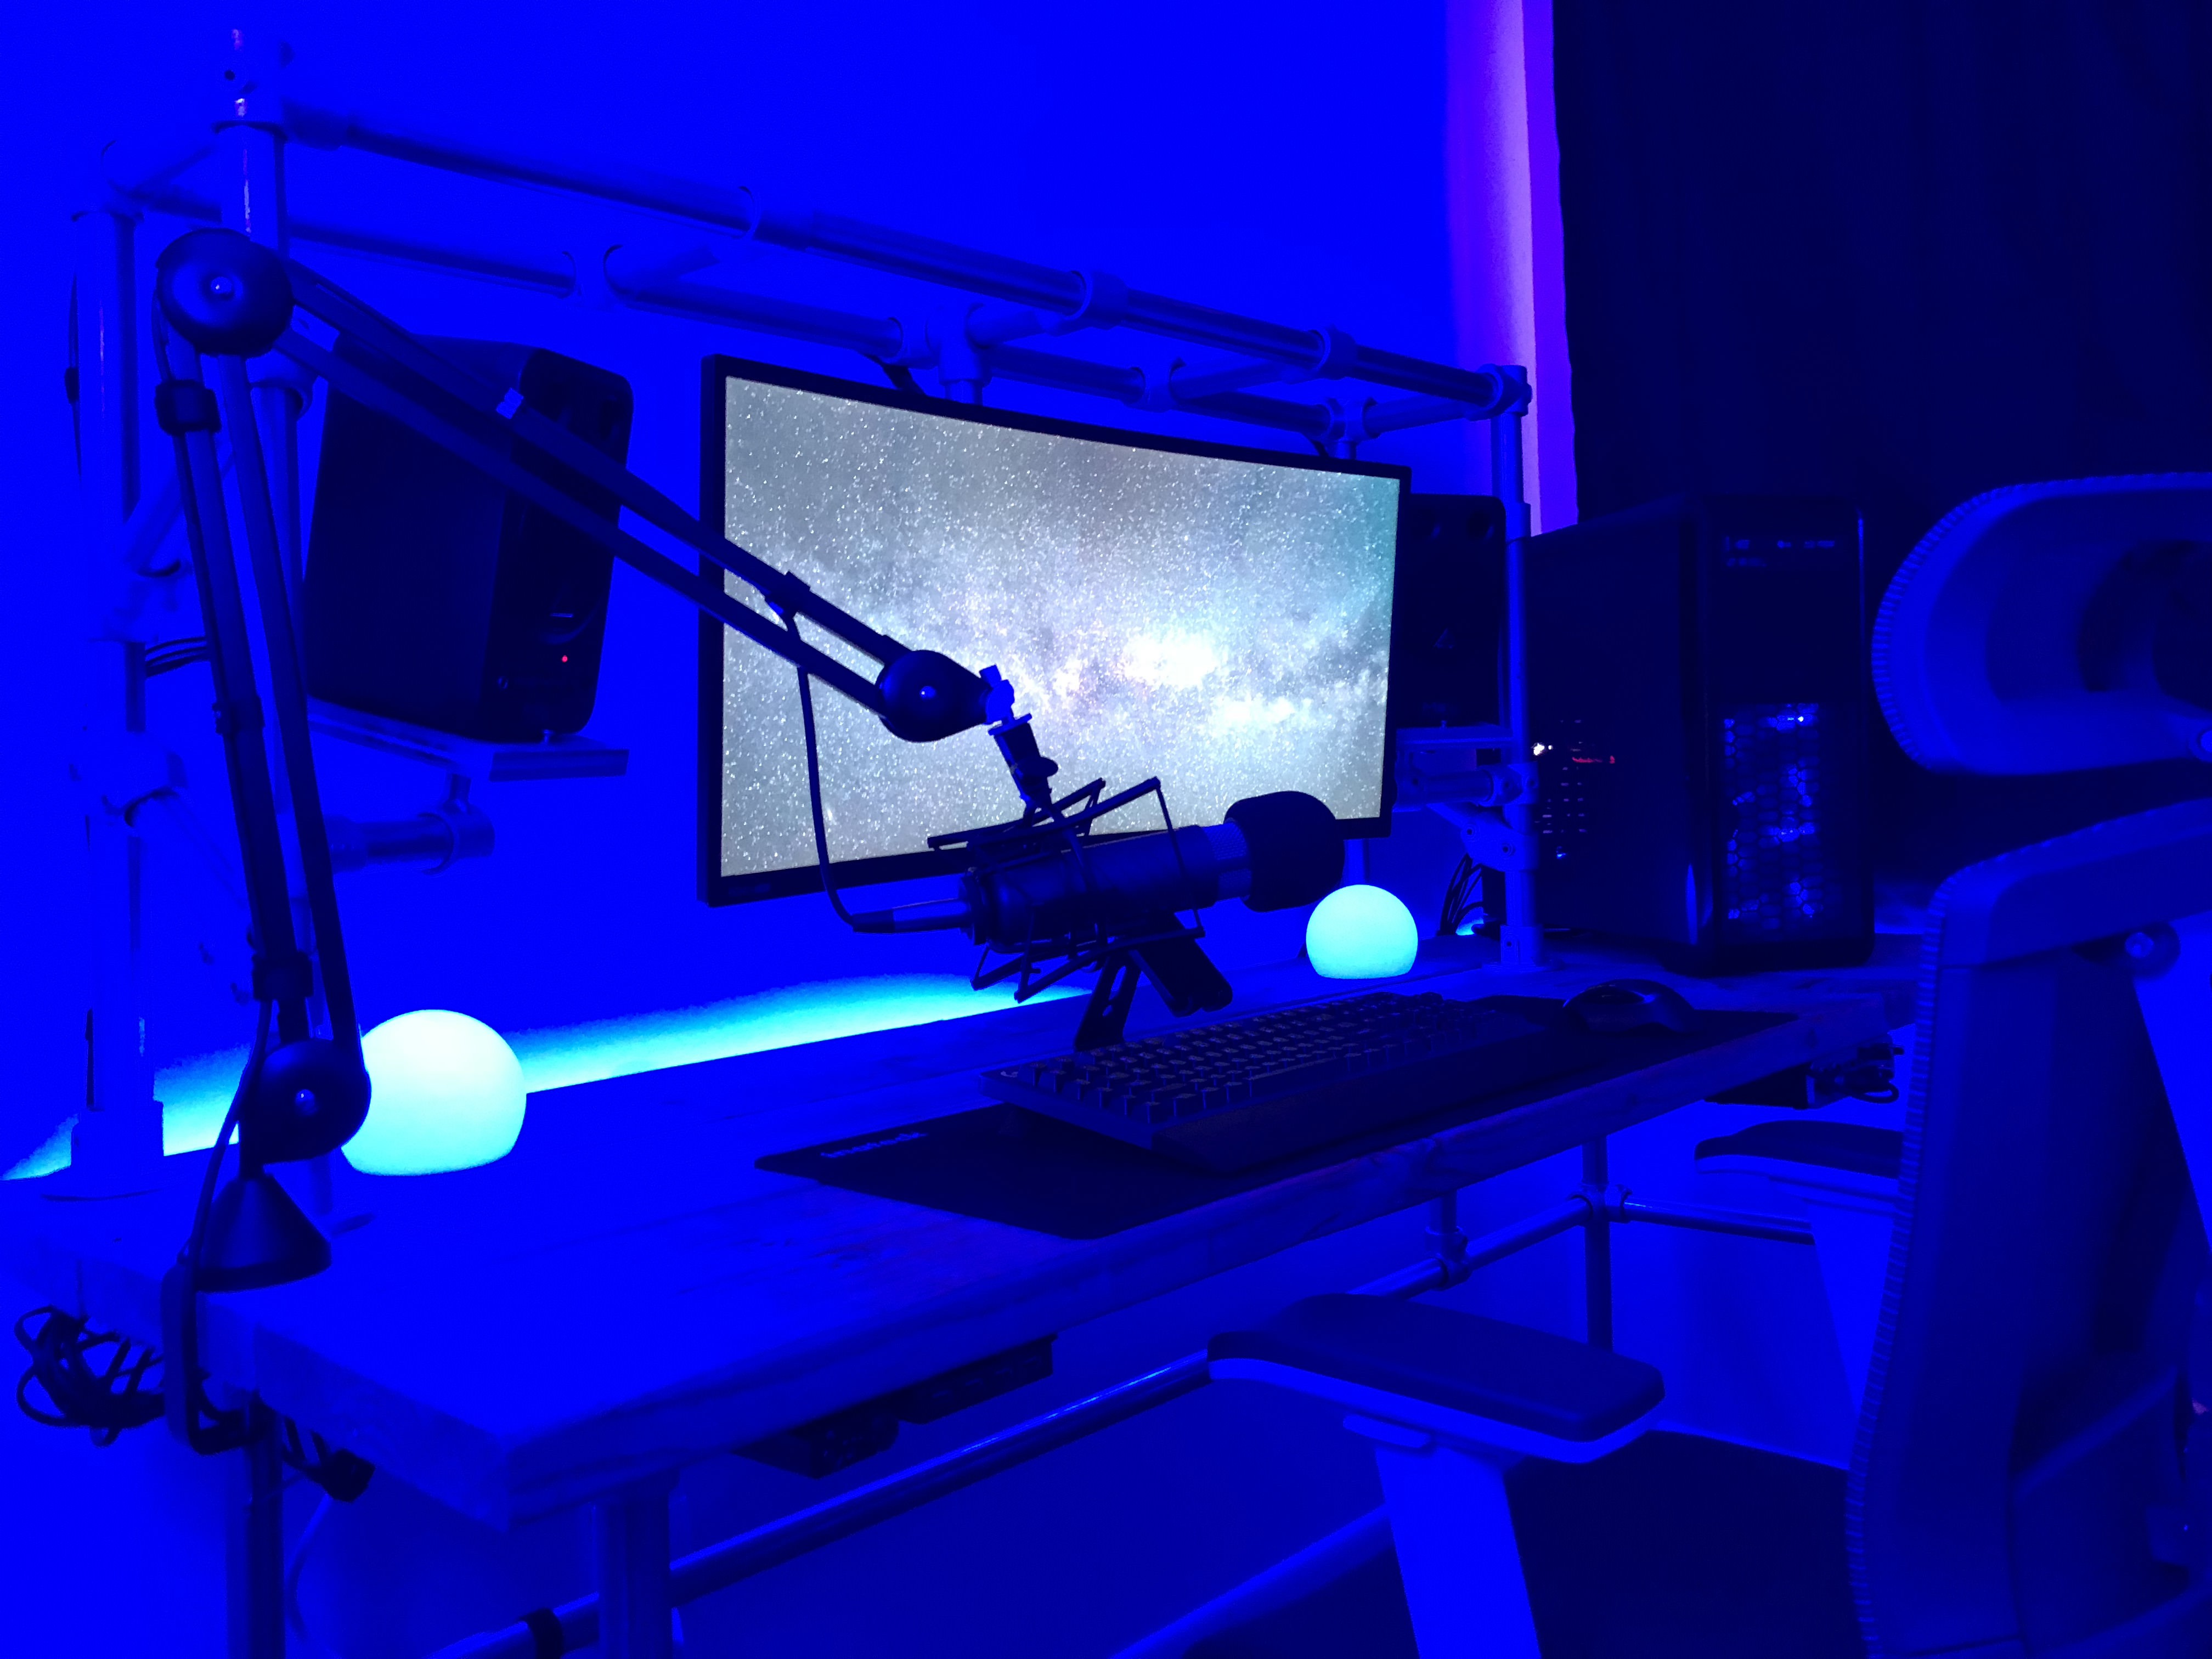
Overall, I’m super stoked about the final product. I love working, streaming, and gaming from my desk. It makes playing on my PC much more immersive, especially with a sick lighting setup.
Assembly was a piece of cake thanks to my detailed SketchUp file.