Bike Camping Guide (How to Plan Your First Trip!)
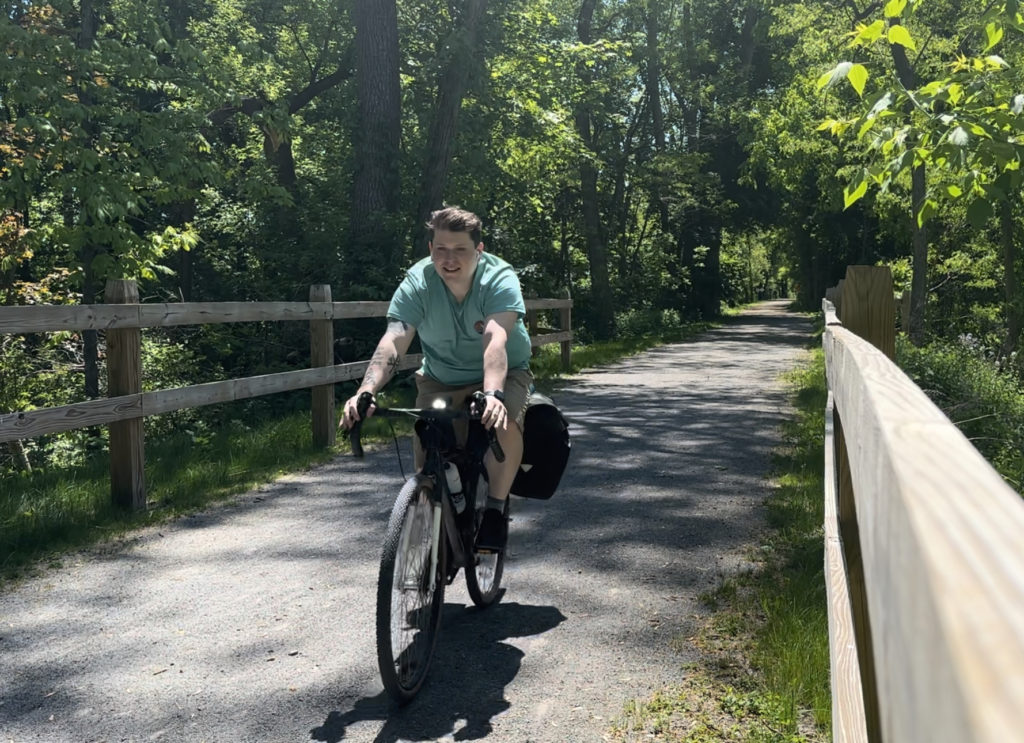
Although I didn’t have the opportunity to go camping often while growing up, I developed a strong passion for bike riding. Even back then, I wouldn’t have considered myself an avid outdoor enthusiast. To this day, that label doesn’t quite fit me. I prefer to describe myself as a nerdy individual who enjoys embracing challenges. That’s where bike camping comes into play—it presents an exciting and fulfilling challenge I wholeheartedly embrace.
After returning to the US in 2020, I needed an adventure, and I wanted to try camping and didn’t own a car, so I opted to travel by bike.
Since 2020, I have taken seven bike camping trips and have loved it each time. I have three more trips planned for this summer. 🙂
I think bike camping is something a lot of people would enjoy if they were willing to give it a try. So this post is a breakdown of why I enjoy bike camping, how to plan your first trip, and what gear I recommend.
- What is the difference between bike camping, bike touring, and bikepacking?
- Reasons I Enjoy Bicycle Camping
- How to Plan a Bike Camping Trip
- Gear You Need for Camping by Bike
- Conclusion
What is the difference between bike camping, bike touring, and bikepacking?
Before we start, it’s helpful to note that a few words describe the same “kind” of thing when it comes to camping and your bike, but I think they are all distinct. Here is how I would define the three common forms of cycling that involve camping.
What is the definition of “bike camping”?
Bike camping is traveling via a one or two-day ride to a designated campsite via your bicycle. Your route is along a predefined trail or road.
What is the definition of “bike touring”?
Bike touring is riding your bicycle for multiple days, usually at least a week, along a predefined route, usually a road or designated trail. You may camp along the way or stay in a hotel, hostel, or traditional housing.
What is the definition of “bikepacking”?
Bikepacking is traveling along a route or general direction that involves a hiking trail, off-roading, and a mountain bike or gravel bike. You would not stay in a formal hotel or hostel while bikepacking and would generally be camping off-grid with no electricity or standard amenities.
Reasons I Enjoy Bicycle Camping
As someone who lives car-free, I only have a few options for getting to and from a campsite besides my bike. Now I could take the bus in some cases, and that’s something that I am interested in trying for the fun of it, but for now, it’s just me and my bike.
It Fits My Car-free Lifestyle
So, reason number one; it fits my car-free lifestyle. I haven’t owned a car since late-2019 and plan on maintaining this lifestyle for as long as possible. You can read more about my car-free lifestyle in my annual cost breakdowns.
Bike Camping Presents a Fun Challenge
The second reason I enjoy it is the challenge. I can’t take everything with me and account for every eventuality, so I have to take some chances, plan, and solve problems.
Sometimes thinking inside of the box, or in this case, a bike, is quite fun. Constraints force you to make decisions and solve problems. As someone who has enjoyed solving problems all their life, this is part of what brings me joy in bike camping: solving problems.
Enjoying the Journey AND the Destination
Another reason I love bike camping is that it allows me to enjoy the journey more than if I were in a car plodding along at 70 mph on a highway. Every time I ride my bike, it’s an adventure.
As the old saying goes, it’s about the journey, not the destination. I’d adjust it to “It’s about the journey AND the destination,” but you get the point.
Bike camping allows me to take my journey at whatever pace I would like and, in most cases, see some beautiful sites along a riverway or old train path.
I’m also a bit spoiled living in Rochester, NY. Bike camping from Rochester, NY, is relatively easy and, depending on which direction you would like to go, allows you to do it almost entirely without interacting with cars.
How to Plan a Bike Camping Trip
Start planning your bike touring trip or bike camping trip before you start buying gear. Your destination, time of year, and terrain will help you determine exactly what gear you need.
Find Your Destination
An easy way to find an excellent destination is to Google “Lakes near me,” “State parks near me,” or “outdoor places near me.” A beautiful or exciting destination will add some nice flavor to your trip. Lakes or state parks also tend to have trails or backroads leading to them, which may help you find a way to get there without interacting with too many cars. Those types of locations also typically have camping options within them or nearby.
Planning Your Route
Use a website like Komoot or bikemaps.net to plot your route. Google Maps is OK, but it is challenging to customize your journey. I use Komoot.
Rails-to-Trail
Another way to choose a nice car-free route is to start with a trail and then find your destination. Rails-to-Trails is a good resource for finding local trails that are longer than just a few miles. RTT helps convert old railroad beds into walking and biking trails.
Adventure Cycling Association
I discovered the Adventure Cycling Association from the Path Less Pedaled YouTube channel a few years ago. They have an interactive map set that spans the country on their website.
Bikepacking.com Routes
An excellent resource for finding pre-determined routes and destinations is bikepacking.com’s bikepacking routes. These routes tend to be a bit more adventurous and lengthy, which is something to note before downloading a map file and heading out the door.
Google Trails
The last way I’d suggest finding your trail/destination is by Googling “long cycling trails in X”, where “X” is your state or area. That is how I first discovered the Empire State Trail in NY and what set me on my first bike tour.
Timing Your Camping Trip
I recommend planning your trip when it is above 20 degrees at night and below 80 degrees during the day. On the East Coast, this tends to be in spring, early summer, or fall. My favorite time to bike camp in New York is from May – Early June and late September – October. The time of year and the weather will impact what gear you need to bring.
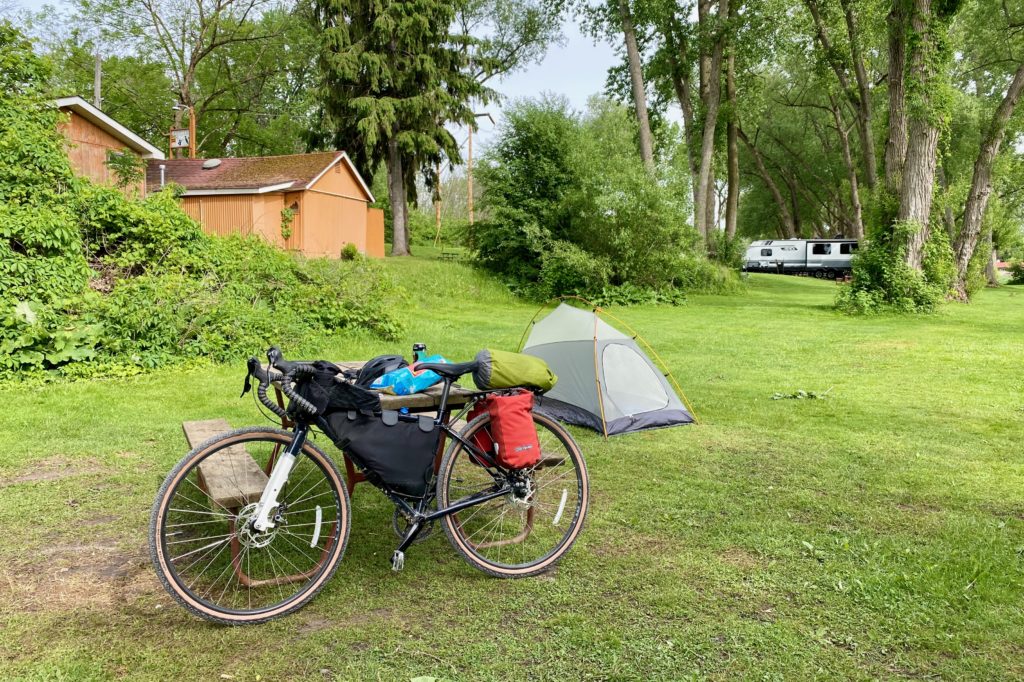
Finding a Campsite
Google Maps is a great place to start. But I would also recommend checking out Hipcamp and Airbnb. Hipcamp tends to have more options in the primitive camping space, but you might be surprised on what you find on Airbnb as well.
Gear You Need for Camping by Bike
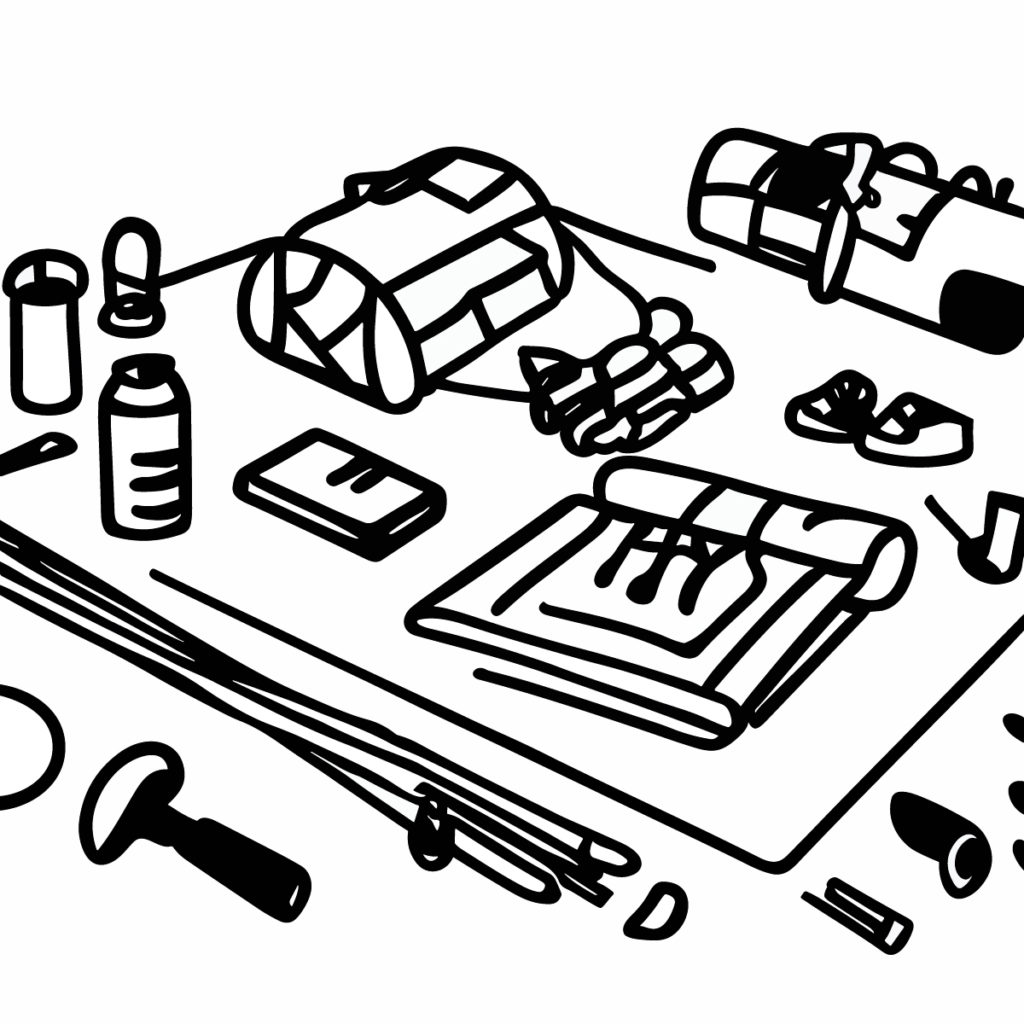
If you’re looking to get started with bike camping but don’t know where to start, here’s a quick guide. If you’re starting entirely from scratch, including purchasing a bike, I’d recommend you set a budget of around $1500.
However, if you’re willing and able to buy used gear and wait for sales, you could get away with a decent setup for around $1000.
This may sound like a lot of money upfront, but if you invest in quality gear, you can use this equipment for many years.
For instance, I’ve had the same gear for the past three years and believe I will get at least two more years out of it.
Let’s say you spend $1000 on your gear. If you take five trips per year and the gear lasts five years, that is $40 a trip. Include the average price of a campsite at $25 per night, and you stay two nights, that is $90 for a two-day trip. Compare that to your average hotel stay; you’re already saving at least 50%.
That said, in the end, I wouldn’t get into bike camping if your sole motivation is to save money. For me, saving money is part of it, but it’s really about creating little adventures, and saving money is a bonus.
Acquire a Bike
The first thing you need for bike camping might seem slightly obvious, but I’ll mention it here to ensure you understand: you need a bike. You can spend $200-$5000 in this area, and options will vary significantly based on your budget and needs.
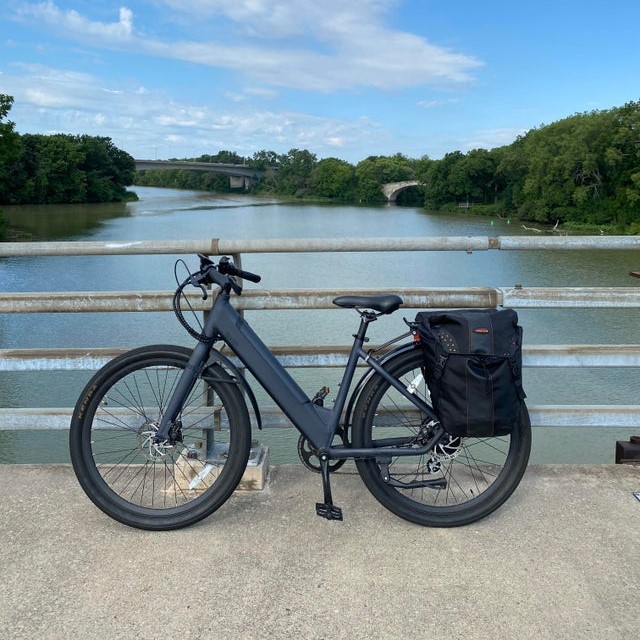
You don’t need a fancy touring bike to get started. You need a bike that can strap some things to. Most bikes have a place to mount a rear rack. Then add a rear rack in some bags, and you’re good to go.
When I first started, I put in a $1700 investment to purchase a Priority Apollo. But I would recommend going for something in the $700-$1000 if you’re just getting started and don’t know if this is something you want to do long-term.
The worst-case scenario is buying a decent bike, taking it out once or twice, and selling it on Facebook Marketplace or Craigslist for 50-70% of the original purchase price.
So, get yourself a bike with the ability to mount a rear rack. I’d start by looking at something like the Cannondale CX 4.
Here are three criteria I would look for in a bike camping bike:
- It has rear rack mounts
- Has knobby gravel or mountain tires (unless you’re solely riding on the road, you’ll want something that can go a little off-road cycling down the beaten path)
- From a reputable manufacturer (Saving $200 upfront might cost you your entire trip if the bike breaks down on your first or second ride.)
Grab Some Bags for Your Bike
I recommend starting simple and cheap. Bags can skyrocket in price and provide diminishing returns very quickly. I’m speaking from experience; I’ve spent over $500 on bags only to realize that I prefer the cheaper ones.
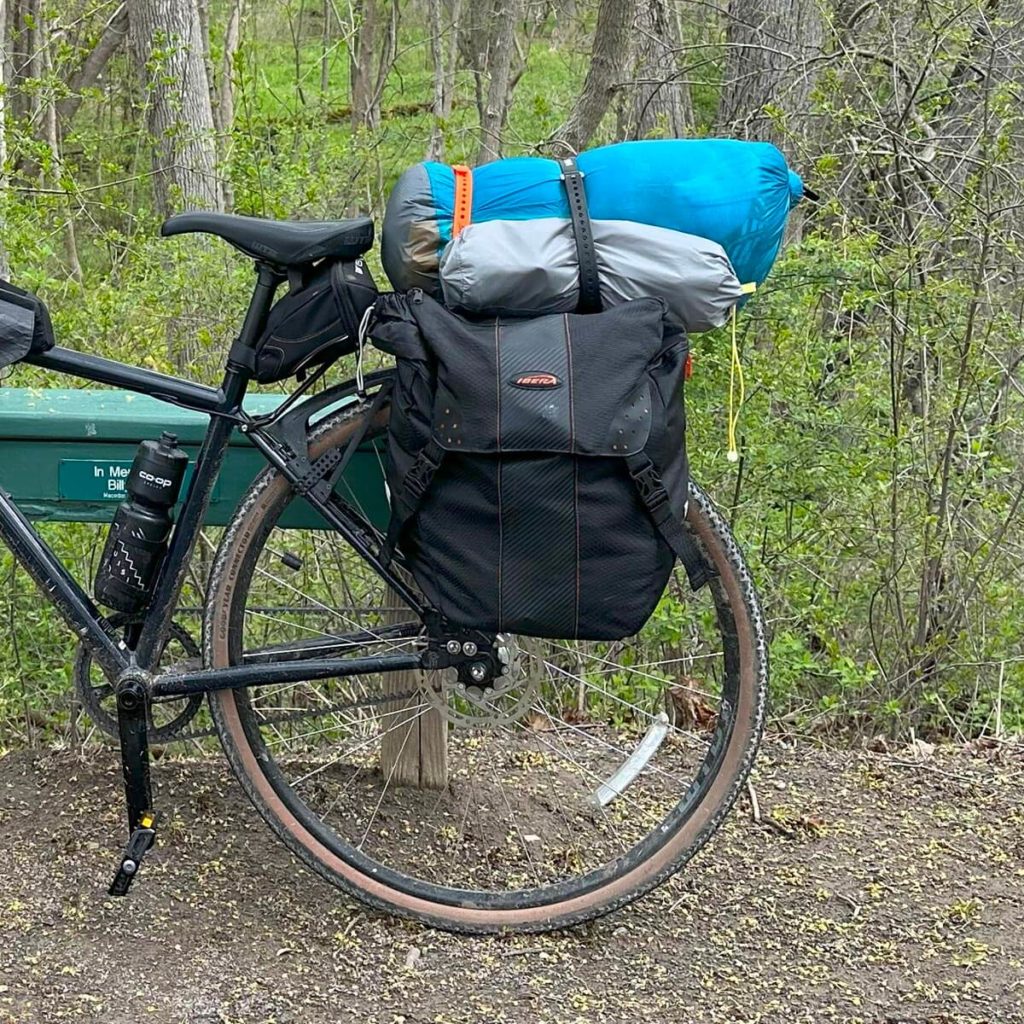
Here are the rack and bags I’d recommend that will get you started:
- Ibera Bike Rack (Buy on Amazon)
- RockBros Panniers (Buy on Amazon)
If you run out of space, I’d pick up a large dry bag and strap it to the top of your rack with some Voile straps.
- 20L Dry Sack (Buy on Amazon)
- 32” Voile Strap x 2 (Buy on Amazon)
Picking a Shelter for Bike Camping
When I started bike camping, I assumed I needed an ultralight tent with just the bare essentials. I went for a bivvy-style tent from Alpkit.
Bivvy-style tents have a few advantages: 1) lightweight, 2) easily-packable into a pannier, and 3) don’t draw attention if you’re stealth camping.
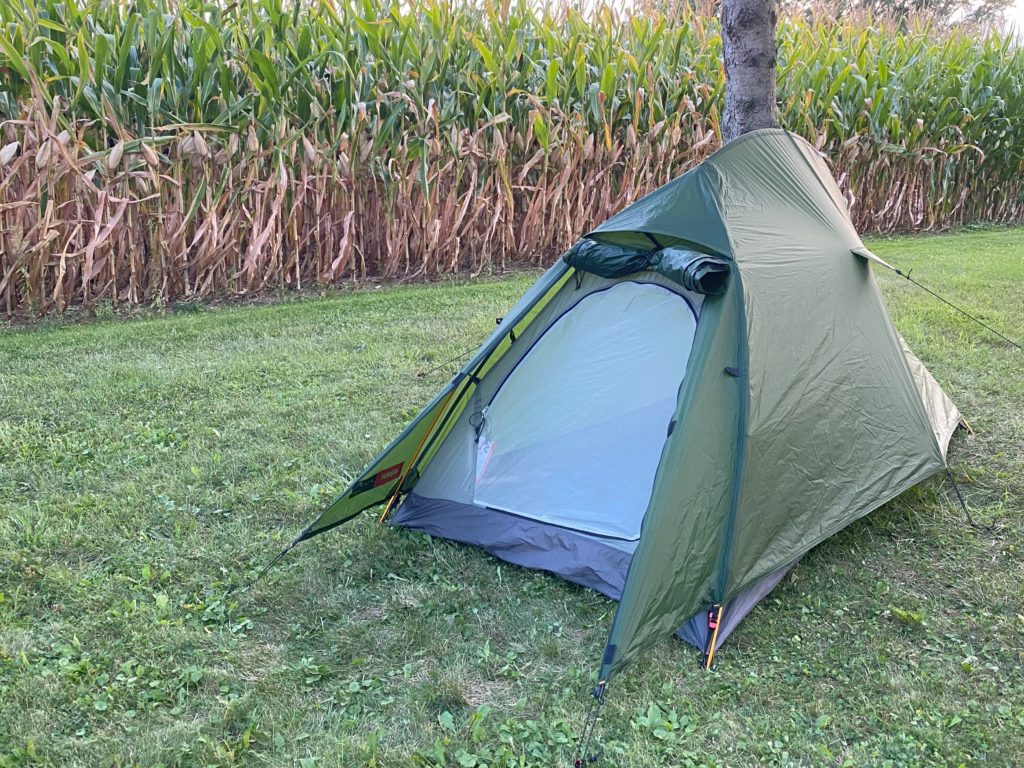
The bivvy-tent worked well for me and kept me dry and out of the wind for my first 2-seasons. But after two years of using the tent, I decided I wanted something more substantial.
This kind of bivvy is excellent for a week-long tour across NYS. But when you’re just doing one day of riding out and a couple of days at a state park, something with a little more room to stash your gear and spread out makes for a more enjoyable experience. You’re also at a designated campsite, so stealth isn’t necessary.
The Tent I Recommend for Bike Camping and Adventure Cycling
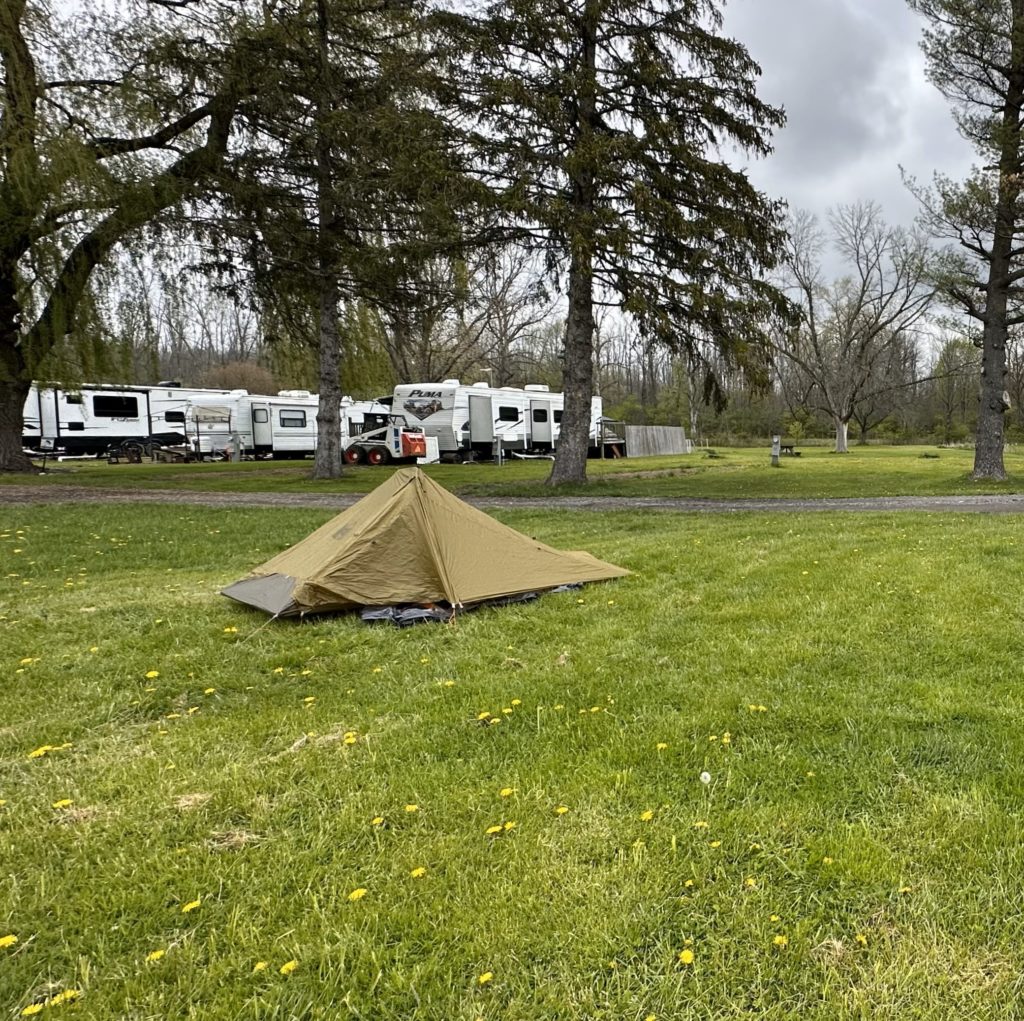
I now recommend the REI Flash Air 2. It combines the packability and weight of an ultralight with a little more wiggle room than bivvy tent. If you purchase it when it’s on sale, you can buy it for under $300.
Ultimately, you’re looking for a tent that matches these three criteria for bike camping:
- Not too heavy (I’d aim for around 5 lbs.)
- Compressable (Look for “backpacking tents”)
- Poles that will fit in a frame bag or pannier (Look for “backpacking” tents).
The general rule is the lighter the tent, the higher cost. This is usually because the material is higher quality, and the poles will be lighter. So pick a tent that fits the camping style you want.
Here is a list of five tents I’ve found for bike camping that matches this criterion at various price points:
- REI Co-op Flash Air 2 Tent (Buy on REI)
- Big Agnes Tiger Wall UL 2 (Buy on REI, Buy on Amazon)
- Alpkit Jaran (Buy on Alpkit US)
- Coleman Peak1 Backpacking Tent (Buy on Backcountry)
- Foreceatt 2-Person tent (Buy on Amazon)
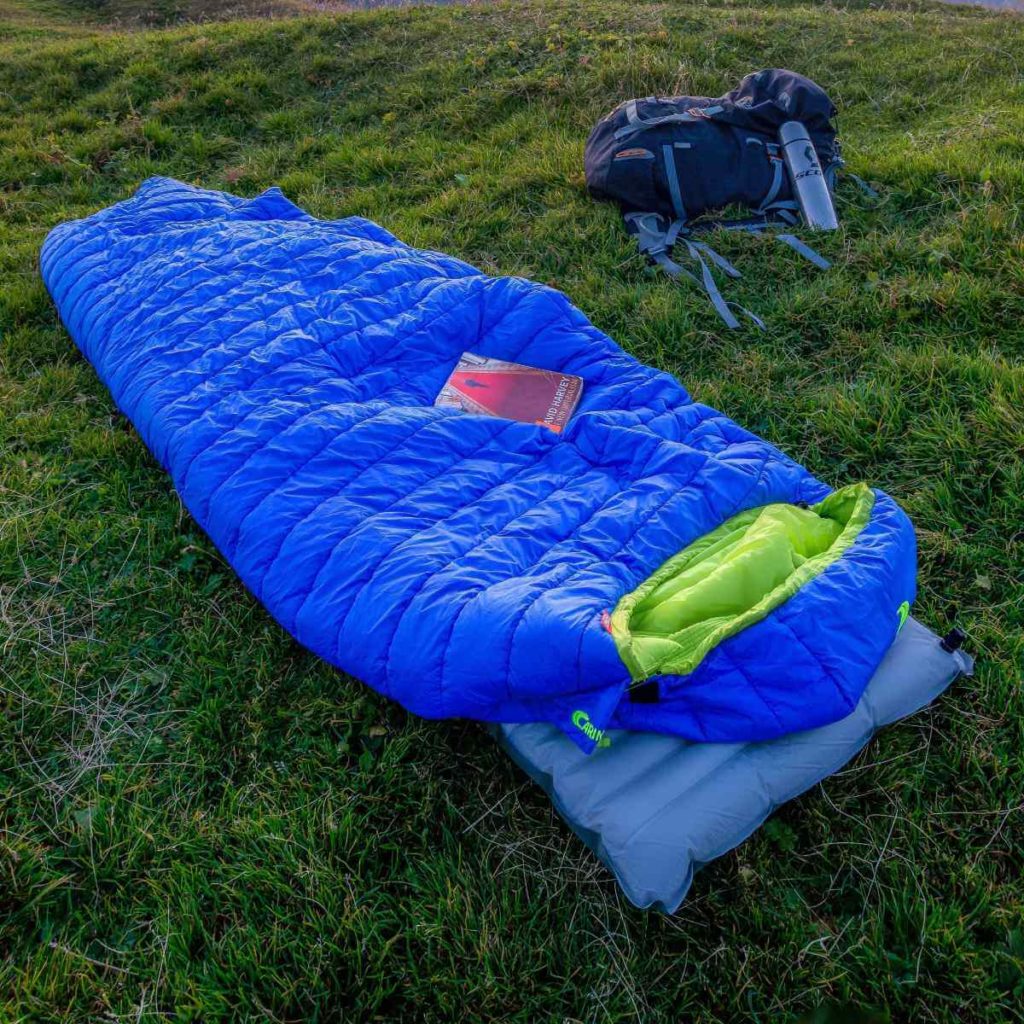
Sleeping Gear
This is an area that I wouldn’t skimp on. You can get away with a cheap bike and a pretty cheap tent. I recommend not trying your way out of spending less than $250 on your sleeping gear. There are two types of sleeping gear: sleeping bags and pads.
Your sleeping bag is what you wrap around yourself, and your sleeping pad keeps you up off the ground. The sleeping pad separates you from the ground, making your sleep more comfortable and warmer as the ground isn’t zapping up all your body heat.
I’d recommend going with a sleeping bag that fits these three criteria for bike camping:
- 3-season, 20 to 39 degrees (this will vary depending on when you’re camping, but we’ll go into that later.)
- Under 5 lbs.
- Comfortable
Sleeping Bags for Bike Camping
Here is a list of five sleeping bags I’ve found for bike camping that match this criterion at various price points:
- Big Agnes Anvil Horn 15 (Buy on Amazon, Buy on REI)
- The North Face Wasatch Pro 20 sleeping bag (Buy on Backcountry, Buy on Amazon)
- REI Co-op Trailmade 20 (Buy on REI)
- Amazon Basics 3-season sleeping bag (Buy on Amazon)
- Groundwork 20F Synthetic sleeping bag (Buy on Backcountry)
As for sleeping pads, you generally pay more for a lighter pad, just like tents.
I would look for a sleeping pad that meets these criteria for bike camping:
- R1 or higher
- Inflatable (this keeps it light and compact)
- 10 inches or under in length (helps it fit nicely into panniers and dry bags)
- It fits your body shape and preferred sleeping style
- If you sleep on your side or stomach, go with a rectangular pad.
- If you sleep on your back or can sleep on your back, go with a mummy-shaped sleeping pad.
Sleeping Pads for Bike Camping
Here are four sleeping pads I’ve found for bike camping:
- Sea to Summit Ultralight (Buy on REI)
- REI Co-op Helix Insulated Air Sleeping Pad (Buy on REI)
- Big Agnes Rapid SL insulated Sleeping Pad (Buy on REI)
- Neo Tensor Ultralight Sleeping Pad (Buy on REI)
Kitchen Essentials for Bike Camping
Before buying kitchen supplies, I’d encourage you to consider where and how long you plan to stay. If you’re within 3 miles of a town or city, I’d recommend picking up food or buying food you don’t need to cook (i.e., sandwiches) along the way or throughout the day.
Camp cooking can be fun, but if you’re looking to relax, you can save a lot of weight and time by going out and getting a pizza or buying some sandwich supplies from the local grocery store. A 3-mile round trip to the grocery store and back will be less than an hour by bike. You’ll also save some time and hassle on clean-up.
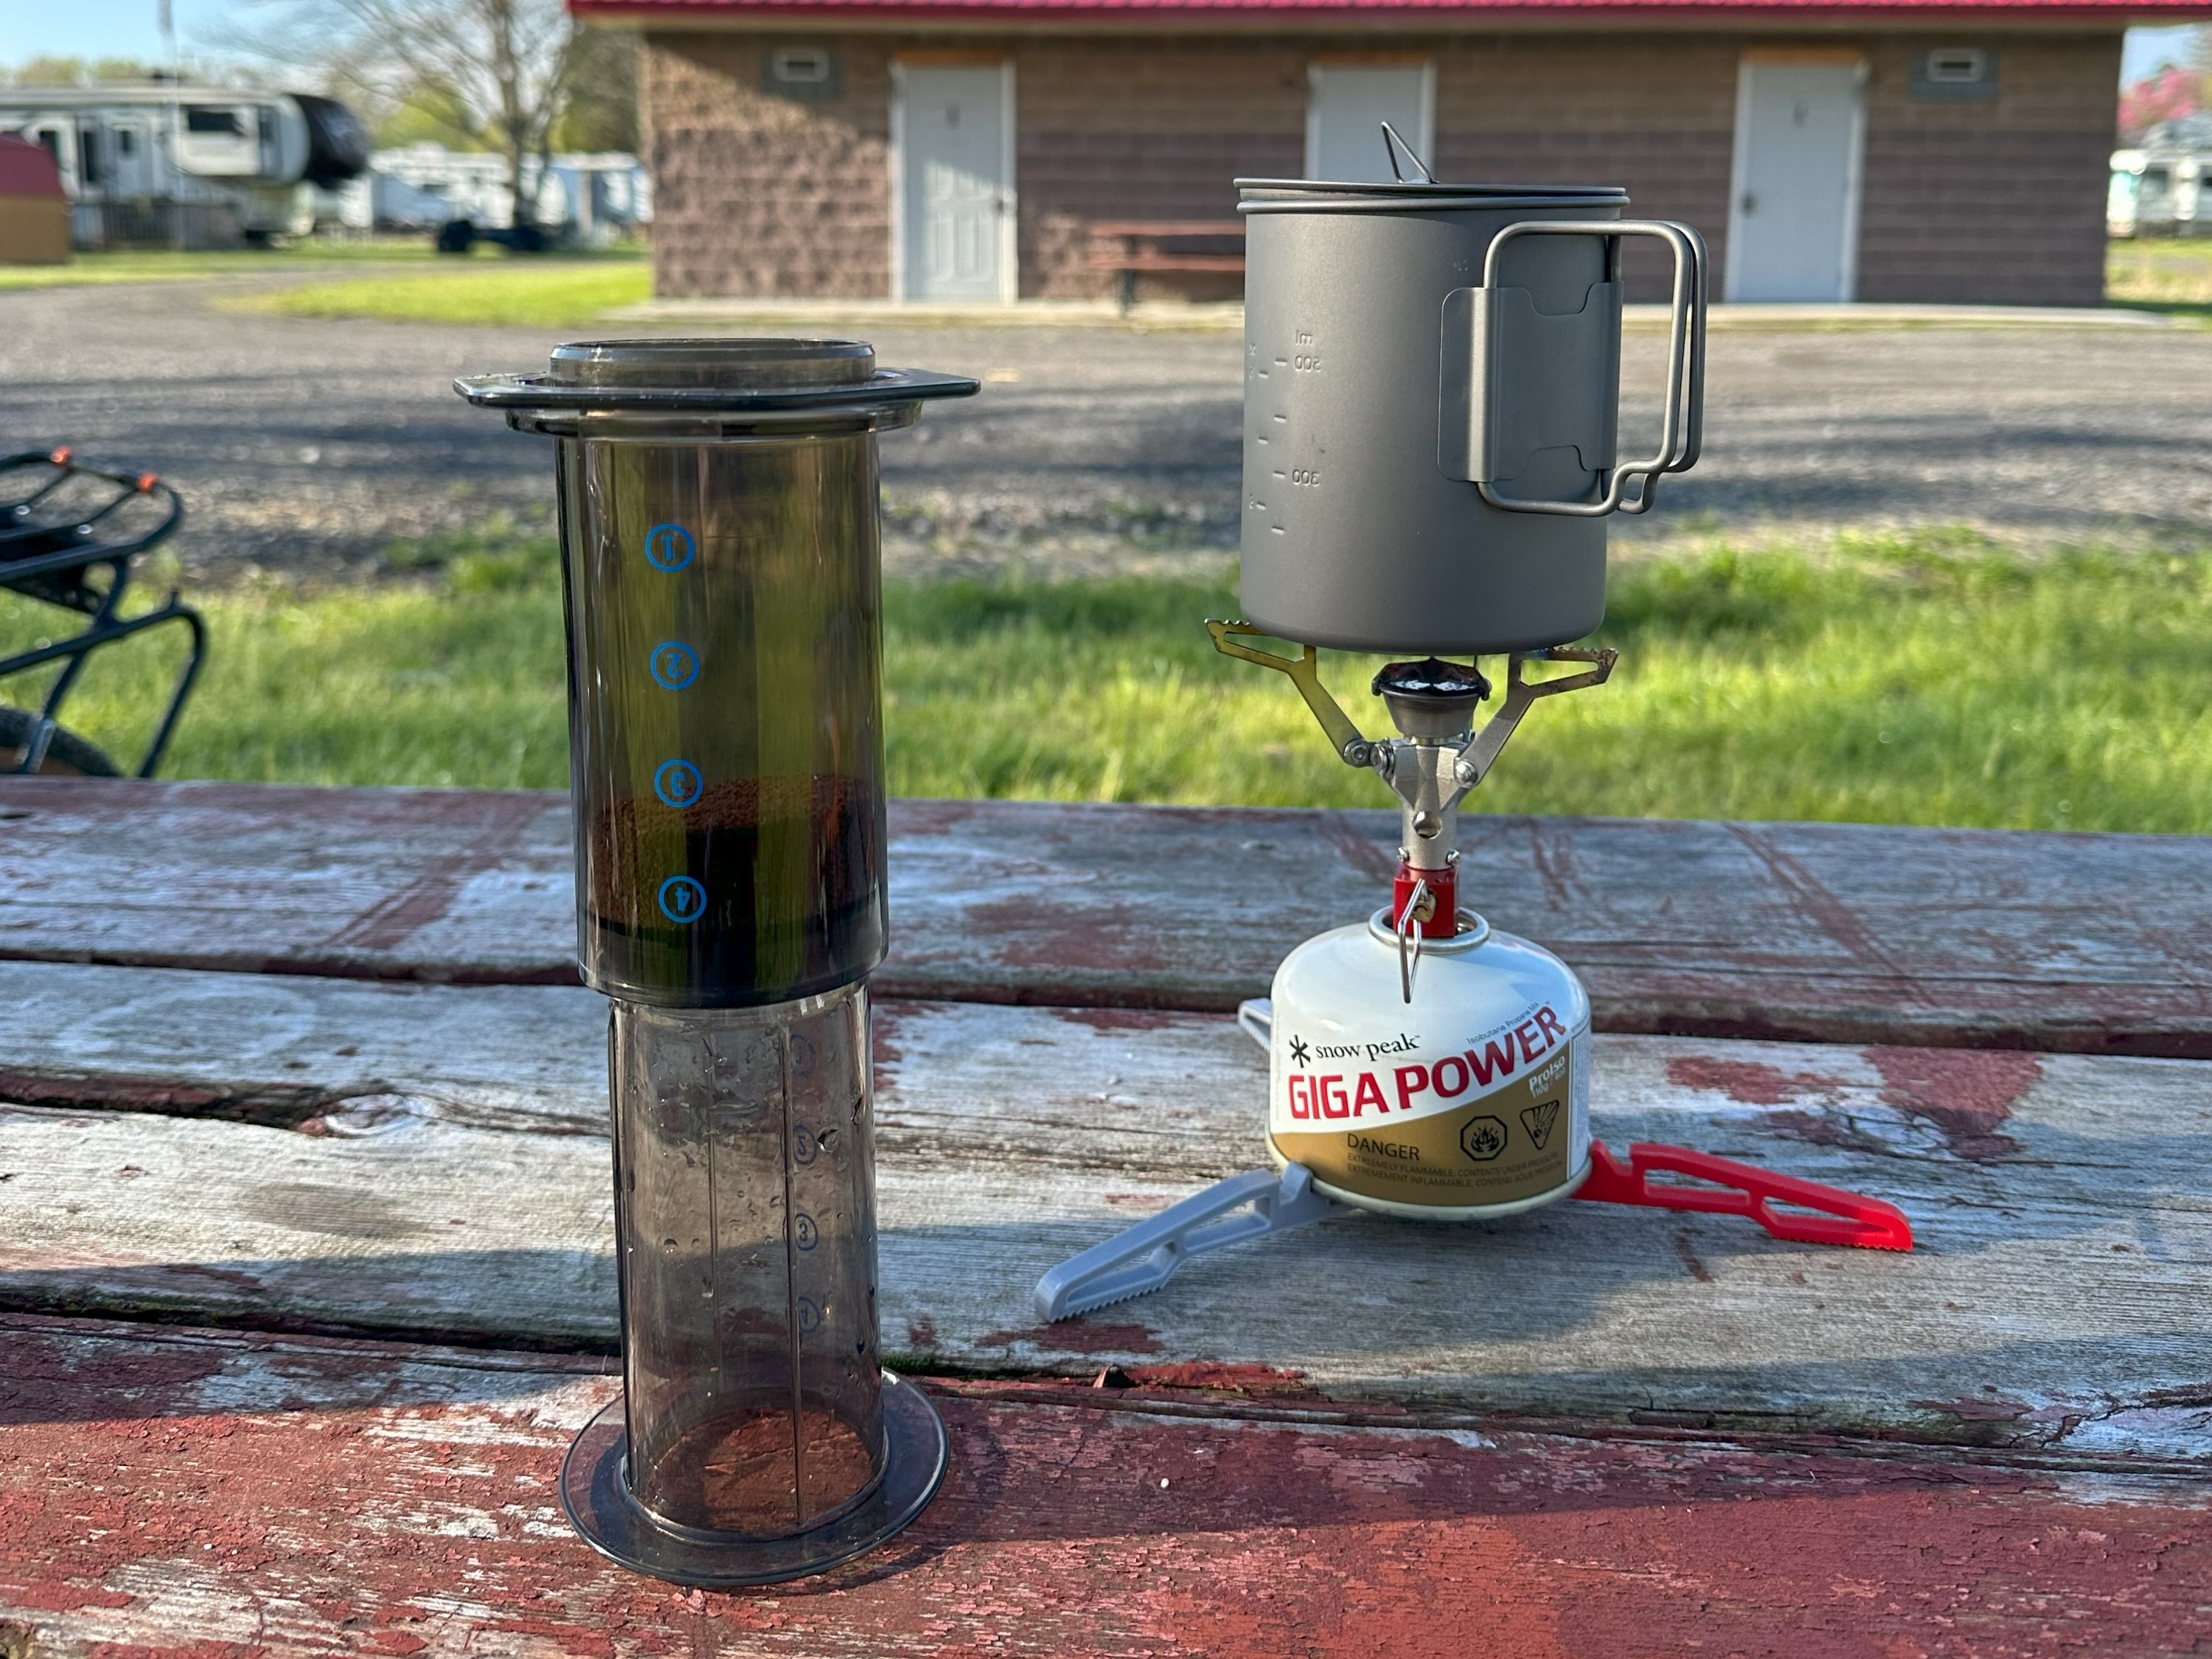
The real reason I bring along a camp stove is to make coffee in the morning.
So if you’re looking to make some coffee in the morning, here is what I recommend you purchase:
- MSR Pocket Rocket 2 (Buy on Amazon)
- Stove fuel (Buy at your local camping supply store)
- Titanium Cup (Buy on Amazon)
- Titanium Spork (Buy on Amazon)
- Aeropress Go (Buy on Amazon)
If you bring some instant coffee or steeped single-serve coffee, you can skip the Aeropress. But I prefer to grind some local beans before I leave home and brew in the Aeropress.
Suppose you’re looking to kit yourself out to cook some pasta or hotdogs. In that case, I’d recommend also purchasing the following tools:
- Sea to Summit X-Pan (Buy on Amazon)
- Sea to Summit X-Pot (Buy on Amazon)
Quality of Life Additions to Your Bike Camping Kit
Now that we’ve covered most of the bare essentials, here are a few things I’d include in your kit to improve your camping experience.
Camping Chair
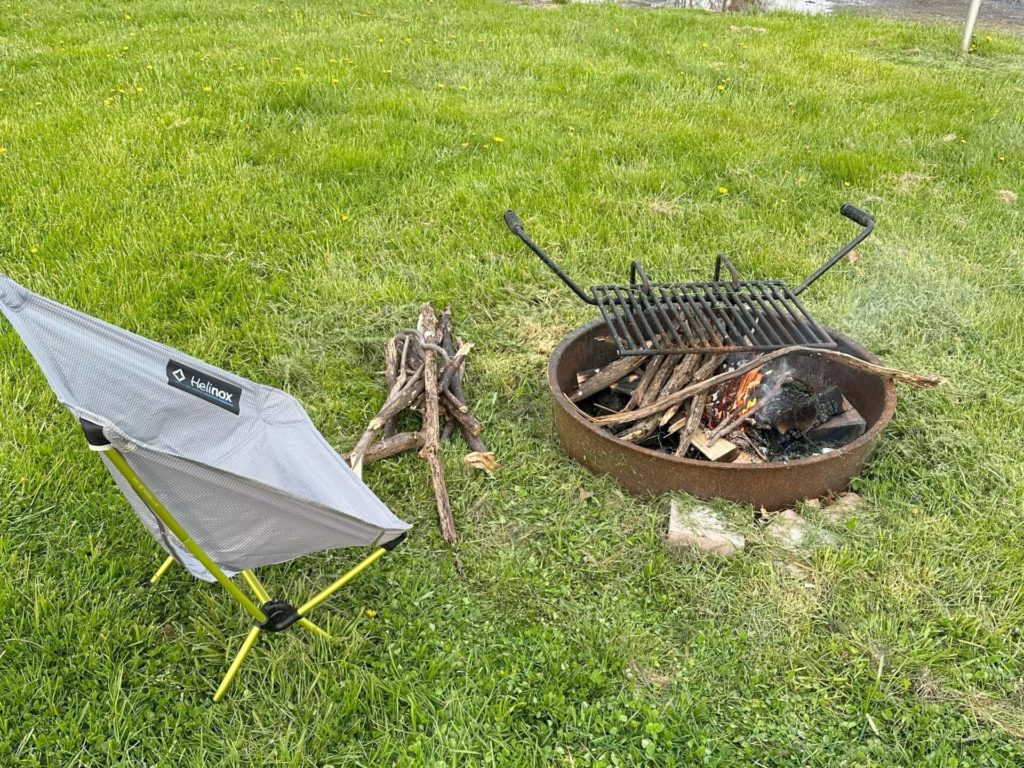
I went on my first five trips without a chair, which was fine. I usually had a bench or took a coat and used it as a quick, dirty chair. But before my first trip in 2023, I purchased a Helinox Chair Zero. Before you have a heart attack, yes, it’s an expensive camping chair. But to be honest, I wouldn’t take another trip without it. If you regularly camp at primitive campsites on Hipcamp, this chair is a game changer.
If you get this chair and own a 3D printer, I’d recommend printing yourself a set of these Helinox feet. They help stop the chair from sinking into the soft ground.
Inflatable Pillow
You don’t need a pillow when camping, so I left it for the QOL section. But it makes my sleeping experience much more enjoyable, so I take an inflatable pillow on all my trips. I use the Alpkit Drift. The Sea to Summit Aeroes is a similar pillow but a bit expensive.
Conclusion
Hopefully, you’re equipped with all the knowledge I wish I’d had before my first trip. Have any questions or want to share some helpful tips of your own? Find me on Twitter @ethan_thompson. I love connecting with other bike enthusiasts.
Affiliate Link Disclaimer
This blog post may contain Amazon affiliate links. As an Amazon Associate, I earn from qualifying purchases. This means that if you click on an affiliate link and make a purchase, I may earn a small commission at no extra cost to you. Rest assured, including affiliate links does not influence the content, topics, or products I recommend. I promote products and services I genuinely believe in and have personally used or researched. The commissions earned through these links help support the maintenance and development of this blog. Thank you for your understanding and support!