How to Install Plex Beta on unRAID: Enable DVR and Live TV
I was very excited when Plex announced they were releasing a version with DVR capabilities. I decided to get all the necessary equipment and give it a try. Sadly, the most confusing and aggravating part was getting the Plex Beta installed on my unRAID NAS. So here is a quick guide on how to install the Plex beta on unRAID.
Before you begin
In order to follow this guide, you will need the following pieces of hardware and software.
- Installation of unRAID
- Plex Pass Subscription
- HDHomeRun Connect or aHDHomeRunExtend (If you plan on using the DVR or Live TV Features)
- HD Antenna w/ Good Range(If you plan on using the DVR or Live TV Features)
Step 1:Sign up for a Plex Pass
In order to install the Plex Beta version, you will need to have a Plex Pass subscription. You can sign up here. It’s relatively cheap and it supports Plex and it’s future development.
Step 2:Get thePlex Beta Version Number
Once you have signed up for PlexPass, log in to your account and go to plex.tv/download. Click on the “Download” button, then select unRAID from the dropdown list.
You will see the latest version number just above the release date. Copy this and paste it somewhere so you have easy access to it later on. I recommend saving it in a text file, just to be safe.(See screenshot below for guidance.)
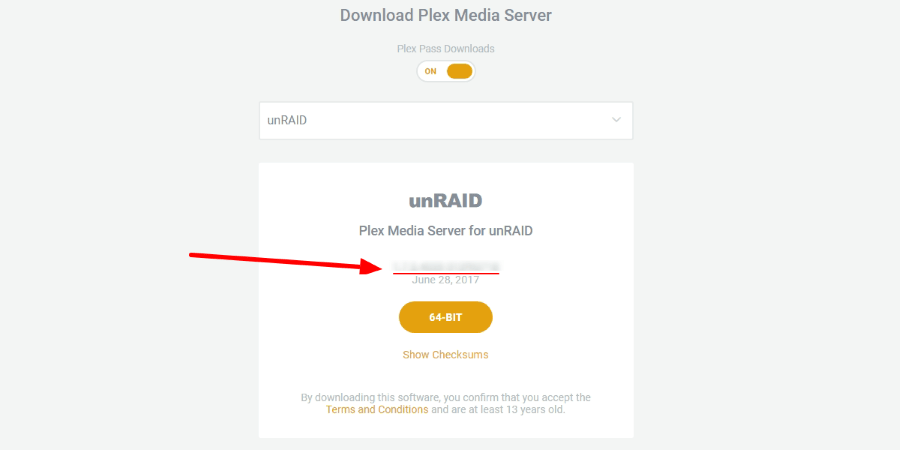
P.S. I will not give you the version number, you need to be a legitimate PlexPass subscriber to access this information. Support companies who make the software you love.
Step 3: Install Community Applications Plugin
The next step requires you to log in to your unRAID server. After you have logged in navigate to the “Plugins” page. Click on “Install Plugin”, and paste the following URL into the text field next to the “Install” button.
https://raw.githubusercontent.com/Squidly271/community.applications/master/plugins/community.applications.plg
Step 4: Install the Plex Container from CAP
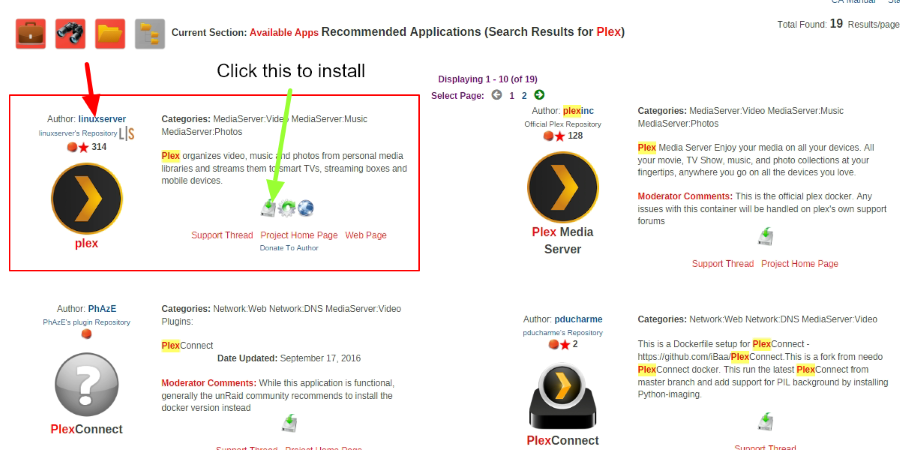
After the Community Applications Plugin has been installed, your screen will refresh and you will now have a new menu item called “Apps”. Click on this and wait for the latest updates to download. Then, using the search bar in the upper right corner, search for “Plex”. You will be shown a few different options, but the plugin you want is from Linux server. DO NOT install the official plex plugin, this will not allow you to choose to install the beta version of Plex. (See screenshot below for guidance.)
Step 5: Change the Version in the Container Settings
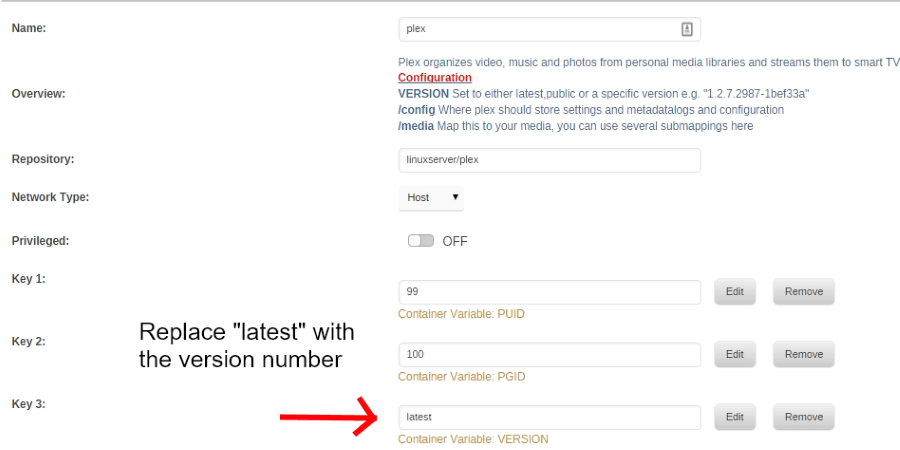
You’re now ready to use the version number you found earlier. On the install page, you will see a field with the word “VERSION” below it. By default, this should say “latest”. Replace the word “latest” with the entire version number of the latest Plex Beta release. (See screenshot below for guidance.)
Step 6: Add Your Shares to Plex
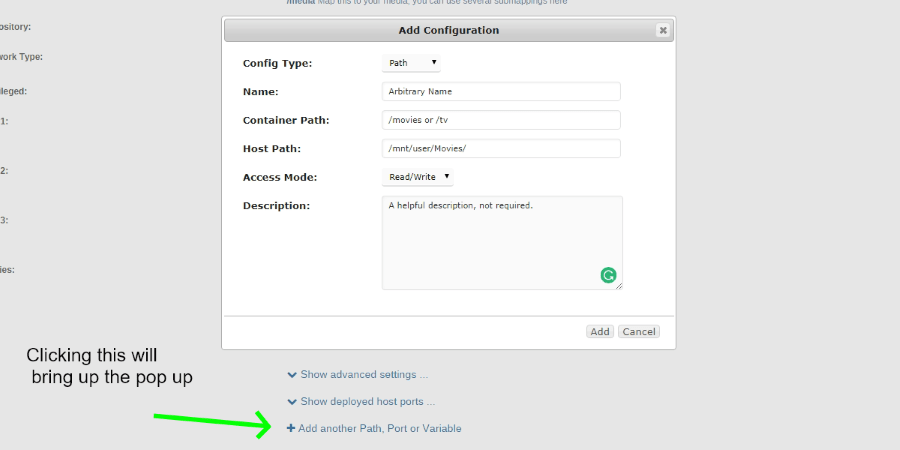
You’re almost done! Now you just need to add your unRAID shares to the container settings, this ensures that Plex has access to the right folders and files on your server. To do this, click “Add another Path, Port or Variable” link near the bottom of the install screen. You will be presented with a pop up(see screenshot below) that you will need to fill out with the following information:
- The “Name” field is pretty much irrelevant, I would name it something simple like “Movies” or “TV”.
- The “Container Path” field is arbitrary, it’s simplywhat will display in Plex when you add the folders to your libraries. Iwould recommend using “/movies” or “/tv”.
- The “Host Path” field is where you will select the share that you are mapping to the path. It will be relativeto your file structure.
- The “Access Mode” field should be “Read/Write”.
- The “Description” field should contain enough information that you remember what the path is. Mine simply say “Movies” and “TV” respectively.
Once you’ve mapped all of your shares that you want Plex to have access to, click “Apply”. The Docker container will be created and your Plex server will automatically start.
Step 7: Navigate to Your New Plex Server!
Give it a few minutes, then navigate to your server’s IP address with port “32400” appended to the end. i.e. 192.111.1.11:32400
That’s it! You now have the Plex Beta features on your unRAID server. Thankfully once you understand the necessary steps getting the Plex Beta installed on unRAID is very easy. If you have any questions or run into any issues, feel free to contact me.